The idea was to have the door fence "morph" into a door shed. In addition, it would be hard to know which doors open or close. Just to throw people off, I added extra door knobs to several doors on the fence (and planned to do so with the shed, too).
Let's start with doors... again, every door was set out, measured and catalogued.

"Bubba" the truck, transports a pile of doors from the Habitat Store

Shed doors... measured, labeled and catalogued!

The final drawings: floor plan and diagram of door placement
If you're not quite sure how to do everything, find someone who can help you work through the process.... enter... my neighbor Edd. Edd's quite the guy; he seems to know how to fix just about anything! We begin with simple plans and decide to use recycled treated 4 x 4 lumber for "skids" and support poles. Just like the fence, I dug three holes for very long treated 4 x 4 posts.

Posts in the ground and ready for skids.
Next, we decided to take more treated 4 x 4 poles and turn them into skids. We attached a 2 x 4 across the back of the vertical poles (leveled with the ground where the front of the shed will sit) so the skid boards would all be level. The skids were then attached to the 2 x 4 and vertical poles (eventually to be made stronger with carriage bolts). On top of the skids, we placed wooden pallets that were all the same size and thickness. (Thank you for the free pallets Moscow Building Supply and J.J. Building Supply!) Next, we attached the pallets to the skids.

Skids and pallets in place... ready for the floor!
For the next part, we had to purchase new plywood. The used plywood we'd been given was rotten. There always has to be a plan "B." We cut the plywood to fit and then started nailing... and nailing... and finally put some deck screws in to really make sure it was all secure. We all got a little "hammer crazy."

Watch out... woman with a hammer!

Nick and David take a break during plywood-attaching process.
After the floor was finished, we attached the back doors first to the vertical poles. We chose the shortest doors (all doors are solid core) for the back wall because we planned to build a "shed roof" with a slope so rain and snow would fall off the back, not the front. Once the back doors were on, we built a frame to attach the side doors. The bottom of each door was attached to the skid below the pallet; the top of the door, to the upper frame.

Doors going on back wall!

Hold the frame still while I hammer these boards together!
Break time! This project ended up taking two Sundays. About the time we had the frame up, it was way past lunch time... Edd needed a break so it was mocha time for all! Everyone sing now (to the tune of "Louie, Louie") Mocha, mocha.... yo baby, make my mocha, mocha... ya, ya, ya, ya, yaaaa.... (repeat).

Hey Edd... How's that mocha?
The side doors went up next and were attached to the frame via amazing "torque" screws. Why I never discovered these before this project, I'll never know! They save sooooo much time!!! No pre-drilling really necessary. David was the man in charge of power tools, Nick helped him hold doors, Edd supervised, and I carried supplies (including very heavy doors) back and forth.

David attaching one of the tall fire doors to the front of the shed

All doors on (with the exception of the front door)...
Wait! Don't tell anyone which is the front door!
Did you wonder how the front doors were secured? Well, we attached a 2 x 4 across the front (on the floor) to the sides of the frame that supported the bottom of each door (via a few screws). Of course, we left an open space for the front door. Then, we attached all the top beams for the roof (see in above picture). The roof pieces were salvaged metal siding given to me by a friend. After being cleaned up and making sure the holes were all plugged up, we began the process of putting on the roof. We then took apart an old cedar fence that I found on Craigslist...

Bubba, it's amazing how much fencing you can hold!
Nick and I did a spectacular job of taking the fence apart. I then "manned" the circular saw (watch out... woman with power tools!) while Nick and David measured and fitted the cut pieces of the cedar fence about 1 inch below the top of the doors up to the roof line. This created a very rustic look. Putting on the roof and "trim" above the doors took most of one entire day.

Nick and Dave put the final screw in the trim!

A view of the finished product from the side!

Inside view before the trim was installed.
(Note the old bathroom cabinet being used as a counter...)
No project is complete without the group posing for a final picture! Our cast of characters for this project included (from left to right) Edd, Nick, David, and me (Del). In the end, we used nearly 98% recycled materials. Other than the plywood, screws (even the nails were recycled) and some of the 2 x 4's, all materials were "re-purposed" from other projects. We even had fun putting a little shelf for plants and hanging a very large wind chime off of one corner. The bench out front? Well, it came from Rosauer's. It had been thrown away (because it was broken) so one of the workers gave it to me. All fixed and ready to go, the new shed looks like a miniature home! The overall size (inside) is 10 x 12 and is large enough for my tools on one side and storage of school supplies on the other.

Watch out Nick! Edd has a crow bar!
After the shed was complete, we had a visitor! Well, actually, we've had two visitors "of the wild kind." The first was within a few days of finishing the project...

"Manny" the praying mantis takes up residence inside...
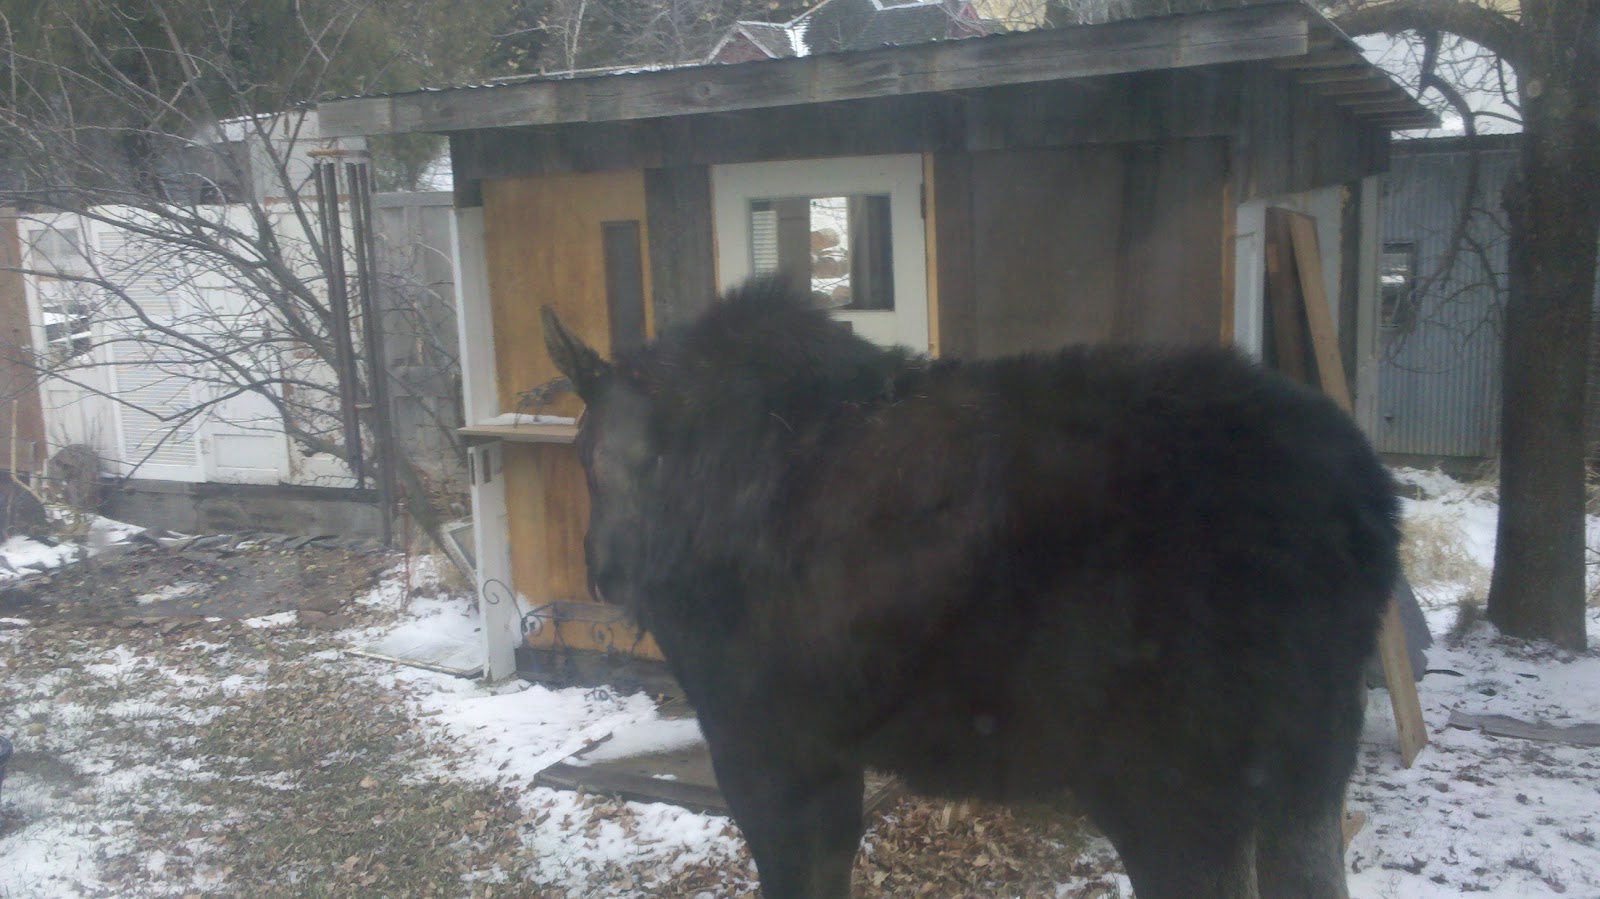
Duh... which door do I use to get in?
For now, that's all folks! Are you curious what I did with the rest of the cedar fence? Keep checking back for the next installment of our story! The only thing missing is a sign for the front door... "Packages accepted at back door." What's up with that? Yes, I'm trying to confuse people. At least the moose is confused...
This turned out great!! I'm so inspired!!
ReplyDeleteThank you, Hillary. I'm about to make another one and make it an outdoor bedroom for the summer time. In order to do a decent sized shed, you need at least 20 doors. Notice how long it took me to recognize there had even been any comments on this... duh... I need to check more often :)
ReplyDeleteVery nice job!!! I am proud to have happened to your blog post! I am also inspired as Ive just learned about this type of project through searching Pallet Shed and plan to start one in the spring at my sons home. Hope to have my 5 yr old grandson help and maybe learn a thing or two about hammer and nails... though I am not a builder/carpenter it sounds and looks as though you and "the crew" had a fun time building it. LOVE IT!
ReplyDeleteThank you ,Clint in Maine
ps: hope the Moose in Maine stay away or at least don't knock it over... as they look as though they grow them bigger up here! Thanks again!
Thanks Clint. I built another one this summer that will eventually be used for an outdoor sleeping area. The only difference is that I used the torque screws which made a HUGE difference. I also used an old gate for the floor rather than pallets. It's hard to find pallets that are the same size. In reality, you'd need 9 that have all the same dimensions, which can be tough at times. Most of the local lumber companies throw them out but because they are becoming so popular, it's hard to get as many as needed in the correct sizes.
DeleteMoose? I haven't seen our resident moose this year but I hear he's been camping out at the neighbor's.